Showing posts with label holiday. Show all posts

Saturday, March 30, 2013

The Easter Lily

Easter lily
An Easter lily

When I was a child, Easter meant spring break, a new dress and-- of course -- a visit from the Easter bunny.

As an adult, though, it has taken on a deeper meaning. Renewal. Rebirth. A chance to wipe the slate clean. To begin again.

The first day of spring, at least in Chicago, is just another date on the calendar. Easter, though, generally is about the time when Mother Nature starts waking up from her winter nap. Although the weather isn't cooperating much this year, the longer days are finally starting to perk things up outside. It won't be long until the gardening year begins.

The Easter lily (Lilium longiflorum) has long been a symbol of hope. And after last year's drought, I definitely need all the help I can get in that department. It will be a reminder in the coming days that I need to find a place in the garden not only for the lily but all the other plants I've been lusting after for the past few months.

Yes, this year in the garden will be better than the last one. Not perfect, but definitely better.

Here's hoping you have a great Easter!


Easter lily close up

By Karen Geisler

Thursday, February 14, 2013

A Valentine Puzzle

Two love birds with a hanging basket of forget-me-nots
"Love Birds," a Valentine Post Card by Raphael Tuck and Sons,
Art Publishers to their Majesties the King and Queen. *

Happy Valentine's Day! There are 16 plant references in the love note below. Some are cultivar names, some are common names. Can you find them all?
 

Ms. Valerie Finnis
214 Columbine Drive
Chicago, IL

Dear Valerie,

Please be my Valentine!

Ever since your friend Carol Mackie introduced us on that May night, I've been attracted to you. Then, at last week's garden club meeting, when I saw your angel face in the morning light, I could resist no longer.

Cupid’s dart hit me and my love lies bleeding. I adore you!

Let me be your Mr. Goodbud, your heartthrob. I want to drink creme de cassis with you under the August moon and kiss your hot lips. Or better still, kiss me over the garden gate later today.
 
Please help my bleeding heart. Don’t break the chain of love.


Your sweet William
 
xoxoxoxoxo
 
--------------
 
The answers are below. How many were you able to find? Any other plant names that you would use in a mash note?
 

Falling in Love rose
Photo courtesy of Weeks Roses

1) Valerie Finnis -- Muscari armeniacum or Artemisia ludoviciana  2) Carol Mackie -- Daphne burkwoodii  3) May Night -- Salvia sylvatica  4)  Angel Face -- Rose  5) Morning Light -- Silver Maiden Grass, Miscanthus sinensis   6)  Cupid’s dart  -- Catananche caerulea  7) Love lies bleeding -- Amaranthus caudatus  8)  Mr. Goodbud -- Sedum  9) Heartthrob -- Viola or Cornus kousa 10) Creme de Cassis -- Hollyhock, Alcea  11) August Moon -- Hosta  12) Hot Lips -- Chelone lyonii  13) Kiss me over the garden gate -- Persicaria orientale  14)   Bleeding heart -- Dicentra/Lamprocapnas spectabilis   15) Chain of love -- Antigonon leptopus  16) Sweet William -- Dianthus barbatus

Give yourself 5 bonus points if you knew that Valentine is the cultivar name of Eremophila maculata or Dicentra spectabilis. Give yourself an extra point for every time you knew a name applied to more than one plant. Give yourself an extra two points if you knew that Dicentra is now officially Lamprocapnas.

By Karen Geisler

* This postcard was dated and postmarked Feb. 13, 1911 by T.B. Hamilton of Argentea, IL near Decatur. It was sent to a cousin, S.H. Nudig in West Fairview, PA.

Monday, December 24, 2012

Season's Greetings

Garden-ornaments-on-Christmas-tree
 
 
Wishing you the very best of holidays!
 
Here's a link to a post from last year,

Enjoy!

Monday, December 17, 2012

Christmas for the Birds


birdseed-ornament-and-orange-cup on a tree


Christmas is for the birds or at least it should be when it comes to treats. With all the holiday goodies popping up in offices and homes everywhere this time of year, our feathered friends in the garden certainly deserve their fair share.

I’ve always wanted to make holiday treats for the wild birds and finally got my act together this past weekend. After all, I live in a subdivision where all the streets are named for birds. What could possibly be a more appropriate way to celebrate the season?

The treats I recently made are described below. Several are suitable for children while others, such as the edible bird seed ornaments, definitely require parental guidance.

Orange cups
 
orange-cup-for bird-seed

Cut oranges in half and scoop out the middle. Poke four evenly spaced  holes around the edge of the orange using a wooden or metal skewer. Cut yarn or string in 12" pieces. Poke the string through each hole and tie it so the string doesn’t slip out. Repeat with the remaining holes. Knot the top ends together. Fill with bird seed and hang on the tree.

These are especially colorful although the process can be a bit messy. You may want to do these near a sink or on some towels. I used red cotton/hemp string to make it a bit more colorful.


Bagel feeder
 
bagel-with-peanut-butter-and-birdseed
 
Cut one stale bagel in half.  Mix together 2 teaspoons of peanut butter and 2 teaspoons of shortening. Spread the mixture on each bagel half. Pour bird seed on a plate. Press each bagel half, peanut butter/shortening side down, onto the plate. Put a string through the middle of the bagel and hang on tree.


Peanut butter pine cones


pine-cone-bird-feeder


Find plain pine cones. Wrap a string around the bottom so it can be hung from a tree.  Mix peanut butter with a little bit of vegetable oil. Spoon it into the pine cone’s crevices. Roll in bird seed and hang. You can also add raisins, other fruit or nuts.  I used some of the leftovers on the bagel feeder shown above.

Log feeders
 
Bird-log-feeder

Don’t forget that some birds are ground feeders. I mixed some peanut butter with oatmeal and spread the mixture on the rough bark side of a split log. The log was placed under the tree where the rest of the ornaments were hung.


Bird seed Christmas ornaments

bird-seed-Christmas-tree
 
These are probably the most complicated treats as they involve some cooking.

        1 package of unflavored gelatin           Drinking straws cut in 2" pieces
        ½ cup hot water                                   Cookie cutter or cupcake pan
        ¾ cup of flour                                       Cookie sheet
        3 tablespoons of corn syrup                  Waxed paper
        4 cups of birdseed

Pour flour into the birdseed and mix.  Heat the water and dissolve the unflavored gelatin in it. Add corn syrup.  Pour water/gelatin mix into the birdseed /flour and stir. It will have the consistency of newly mixed Rice Krispie marshmallow bars.

Put wax paper on the cookie sheet and choose a cookie cutter that does not have a top. Grease the insides of the cookie cutter and place on the wax paper. Fill the cookie cutter about halfway full or put a thick layer in the bottom of the cupcake tins. Press down hard and I do mean hard! Use the straws to poke a hole where you want the string to go. Refrigerate at least overnight.

This made 6 rather large gingerbread men. I also made some Christmas trees with a second batch, but the weight of them proved to be too much for the hole. I ended up tying them up with colorful string and hanging them on the tree that way. (See photo above.) When I make my next batch, I will probably use a smaller shape, like a star, and put the hole in the middle.
 
 
The Finished Tree
 
tree-with-birdseed-ornaments
 

It took the neighborhood birds a while to realize the treats were there. By the time my son came home from school today, though, he found the pear tree had turned into Party Central! (Now if only I can figure out how to attract a patridge....)

I hope you’ll try making at least one of these treats with wild bird food this holiday season. They make a colorful display in the yard and also make great gifts for the bird lover on your list.  Either way, the birds will thank you.

By Karen Geisler

Sunday, December 9, 2012

Meet Me Under the Kissing Ball

Kissing Ball
 
I’ve never cared much for mistletoe at Christmas. A kissing ball, though, now that’s a different story.

Not that I need a kissing ball in my life, mind you. (Although after 25 years of marriage, it probably wouldn’t hurt either.)

No, I like the idea of a kissing ball. Festive greens hanging on a colorful ribbon. An excuse for smooches, hugs and a little PDA (Public Display of Affection) around the holidays. What’s not to like?

Somehow I’ve just never gotten around to buying or making a kissing ball. I've vowed to shake things up a bit this Christmas, though, so it went straight to the top of my to-do list.

Mistletoe goes way back to the ancient Greeks and the Druids. Both used mistletoe -- thought to symbolize fertility and power -- during their celebrations of the winter solstice, the shortest day of the year.

The tradition evolved. Evergreens were added. During the Middle Ages, anyone standing under the mistletoe could not object to being kissed. And anyone who wasn't kissed under the mistletoe supposedly wasn't going to be married in the next year. Or so the story went.

The Victorians updated the tradition a bit more, adding herbs. The kissing ball reached the height of its popularity although it has made a comeback in recent years.

So how to get a kissing ball? I thought initially about trimming the boxwoods in my back yard.  But they’re only a few years old and I loathe cutting back anything that’s still green in my garden this time of year. So it was off to my favorite nursery/garden shop.
 

Red berries for a kissing ball
Red berries, red ribbon and cedar
 
I gathered up some oregonia, which is like boxwood but with white and green leaves, and a packet of (fake) red berries. Then I visited a craft store for some ribbon and a base. There wasn't any floral foam to be found, at least in a ball shape. Floral foam gets soaked in water and would have kept the greens from drying out. I checked other stores, but came away empty handed so I reluctantly went with Styrofoam.
 

Kissing ball base with straw and skewer
The process of making a kissing ball turned out to be much more involved than I had anticipated. I put a metal barbecue skewer through the middle of the ball, then used the skewer to guide a drinking straw. That, unfortunately, was the easiest part.
 
Next, I  cut some transparent ribbon, enough to make a loop at the top and have some dangling below the ball. I pushed the ribbon through the straw using the same metal skewer. Then, I put a knot on the bottom where the ribbon came out in order to secure the ball.

I started cutting oregonia and putting it all around the foam ball. Using a toothpick to make a hole before inserting the evergreen sprig made things go much faster. The more oregonia I put on the ball, however, the more the bottom knot in the ribbon seemed to slip. I ended up putting a toothpick in the bottom knot to make it hold better.

A toothpick at the bottom helped
keep the knot tight
After I had covered the entire ball with a spotty layer of oregonia, I added some cedar leftover from my winter container and some trimmings from the Frasier fir we had bought as a Christmas tree.
 
Then I went back and filled in the bare spots. And filled in the bare spots. And filled in even more bare spots.
 
The final touch: Adding berries all over and some thin gold and light green ribbon at the bottom.

Total time elapsed: 5 hours

Well, I had been halfway watching some of the Sunday morning political talk shows when I started but the total amount of time did take me aback. Maybe it was because I hadn't made a kissing ball before. 
 
I'm happy with the result although the jury is still out on whether or not it boosts the amount of kissing in our household this Christmas. Even Nate Silver probably couldn't call this one.

By Karen Geisler

Monday, December 3, 2012

Ten Steps to Great Winter Containers


Winter container garden with fresh evergreen (Photo credit: Karen Geisler)
 
With the start of December, it's time to go full speed ahead on everything Christmas -- even if the temperatures in Chicago are near 60 degrees. For me, that means decorating the front door with a container full of fresh evergreen branches.

I still customize and hang a wreath as I've done for more Christmases than I'd care to admit. A winter container garden, though, is a recent addition and has proven to be a nice complement.  It was a bit intimidating at first, but with a few helpful hints from my co-workers, the pots have started looking better and better.

Tip #1 -- Use many different types of evergreens. Spruce and pine are all well and good, but other evergreens can add different colors, textures and fragrance. The more the merrier!

Tip #2 -- Use topsoil, not potting soil, in your winter container. Topsoil is heavier and therefore much better at holding evergreen stems upright.

Tip #3 -- Make it your own. Add berries and other natural materials. Throw some glitter in the mix. Or omit red to make it more of a generic winter pot. It's all up to you.

Below is the official Chalet Nursery winter container "recipe" formulated by horticulturalist Jennifer Brennan. Its 10 easy steps will help you add a classy touch to your home's entrance in no time flat.

Ingredients:            Spruce tops, small or medium
      White pine tips
      Noble fir tips
      Port Orford cedar
Blueberry juniper
Incense cedar
Winterberry and red twig dogwood 

Tools needed:         Top soil, placed in container and watered
                                    Polyurethane container
                                    Pruning shears
                                    Wire cutters
                                    Wilt-Pruf
 
Step by step directions:
 
  1. Select a spruce top that is twice the height of your container and insert into the middle of the container.
  2. Insert 3 more spruce tops that are shorter than the first, placing one in each third of the surrounding area. This is your “foundation,” the basic form of your arrangement.
  3. Select 5 white pine cuttings to insert through out the spruce top foliage for texture and color variation.
  4. Add 3-5 Noble fir tips.
  5. Accent with 3-5 Port Orford cedar tips for an arching soft shape and for the lemon scent it provides.
  6. Place 3-5 incense cedar tips throughout the arrangement to accent with the yellow color; one in the middle of the arrangement, 1-2 cascading over the edge of the pot, and 1 echoing the central spruce top.
  7. Do the same with blueberry juniper if desired.
  8. Use 5 redtwig dogwood stems as color extensions, placed throughout the arrangement.
  9. Place 3 winterberry stems for the final accent. Use as you would use lipstick – the focal point, to draw the eye into the most interesting part of the arrangement. You can also add pine cones, lotus pods, eucalyptus and other materials.
  10. Spray the entire arrangement with Wilt-Pruf (to prevent drying) and place outside to enjoy until March.
Yes, that's right -- March. A few branches may turn brown, but most of the arrangement should last until you can almost smell spring in the air. For the best results, try planting some miniature evergreen trees in your pots and generously water them in.

In the picture above, I kept the arrangement low because my container, the base on an old fountain, was shallow and already pretty high. It includes white pine, Noble fir, Port Orford cedar, incense cedar, red twig dogwood, huckleberry stems, seeded eucalyptus, lotus pods and some red balls.

A note about containers: Use one made of metal, resin, plastic or concrete. If you use ceramic or terra cotta, it could crack if the soil has water in it and freezes.

Picture below are some pictures of winter container gardens done by Chalet. How do you decorate your front door for the holidays?

Winter pot with winterberries by Chalet Specialty Garden Care staff

Winter pot with blue eucalyptus and white sticks by Chalet's Specialty Garden Care staff

Winter container garden with oregonia and orange berries by Chalet's Specialty Garden Care staff
 
 
Winter container gardens with dogwood and winterberry by Chalet's Specialty Garden Care staff


By Karen Geisler

Sunday, November 25, 2012

Poinsettias


Enduring Red poinsettias

Enduring™ Red Poinsettia

No flower says Christmas to me more than the poinsettia. It's as much a part of the holiday as Christmas trees and wreaths.

I still remember going to church as a young child and being amazed at the sea of bright red poinsettias at the front of the church. There's also the legend of the poinsettia -- how a poor child, having nothing else to offer, gathered a bouquet of weeds to lay at a Nativity scene on Christmas Eve only to see them burst into bright red blooms.

John Roberts Poinsett

It's hard to believe that they were first introduced in the U.S. more than 180 years ago after Joel Roberts Poinsett, the first U.S. ambassador to Mexico, sent some back to his greenhouse in South Carolina.

He had many other accomplishments in his life -- Congressman, Secretary of War under President Van Buren, organizer of the first National Gallery of Art and founder of what later became the Smithsonian Institution. This amateur botanist, though, will mostly be remembered for a colorful Mexican plant.

The botanical name is Euphorbia pulcherrima, which literally means "the most beautiful Euphorbia." You'll find lots of this plant variety for sale at your local nursery each spring although they are annuals -- not perennials -- in the Chicago area.


Carousel Dark Red poinsettias

Carousel ™ Dark Red Poinsettias


What most people think of as flower petals actually aren't. They're technically bracts or modified leaves. The "flowers" are the small yellow structures at the center. And, contrary to popular opinion, the plant is not poisonous.

Poinsettias that grow in the wild are much different than what you'll find in the U.S. today. They're shrubs that are much more open and even scraggly at times. (For some pictures, click here.)

Modern varieties have been specifically developed to have a high number of blooms per stem. For years, most of these were bred and grown in California by the Paul Ecke family. That, however, has changed in recent years as production moved to Guatemala and other growers figured out ways to make the plants fuller. In August, the Ecke family announced it was becoming part of Dutch-based Agribio Group.


Visions of Grandeur poinsettia

Visions of Grandeur™ Poinsettia

Although one can supposedly get a poinsettia to bloom the following year, I've never been able to do it. It needs to be cut back, put in the dark and then brought out and put into bright sunlight, something I really don't have at my house.

If you'd like to give it a try, check out this fact sheet from Ohio State University. 

There also are two events in the Chicago area, both with free admission, if you'd like to see lots of poinsettias all at once.

The annual holiday show at the Garfield Park Conservatory opened Saturday and continues through January 6. All of the photos in this post were taken there. While repairs from last year's devatating hailstorm are still underway, the flowers in Horticulture Hall are quite lovely.

Cantigny Gardens in Wheaton also will have an open house on Tuesday, Nov. 27 from 10 a.m. to 2 p.m. featuring 3,000 poinsettias in its greenhouses.

Just the idea of raising that many plants at once is enough to give me a headache! I think I'll stick with buying one plant as I usually do each Christmas. I'm obviously not alone as poinsettias are the best-selling potted plant in the U.S. and Canada.

Here's hoping one of the many varieties available will brighten your home this holiday season.

(For more information from the University of Illinois Extension about poinsettias, click here.)


DaVinci poinsettias Garfield Park Conservatory
Da Vinci™ Poinsettias at the Garfield Park Conservatory


Pink Cadillac pointsettias
Pink Cadillac Poinsettias


Snowcap pointsettias
Snowcap Poinsettias


Sparkling Punch poinsettias

Sparkling Punch™ Poinsettias

 
By Karen Geisler

Sunday, November 18, 2012

A Fall Bouquet


The last flower has faded. All the leaves have fallen from the trees. And the frost has been on more than just the pumpkins.

It's time once again for the final fall bouquet.

This has become an annual tradition for me. I'm the only member of my immediate family who doesn't live in our hometown, so I always spend Thanksgiving at the house of a relative. I usually make this bouquet as sort of a host/hostess gift using dried materials from my garden.

(Of course, there have been several years when I've forgotten the arrangement in my rush to get out the door, but I try to tell myself it's the thought that counts.)

Finding good quality materials in the garden wasn't as easy this year, courtesy of the drought. I started with the old standbys --  hydrangeas, switchgrass (Panicum virgatum 'Northwind'), coneflowers (Echinacea ssp.) and Culver's Root (Veronicastrum virginicum). I threw in some seed pods from sweet coneflower (Rudbeckia 'Henry Eilers') and some cattails cut from a roadside ditch.

Then I added some dried Queen Anne's Lace. Yes, the same wildflower/weed that spread rampantly in my garden, causing countless hours of back-breaking labor. It does look nice dried, however, with its starburst-like seedheads. Anyway, I figured it was pay-back time.

Finding some color proved to be my biggest problem. With last year's warm, extended fall, I could use some brightly colored leaves from my trees and shrubs. Not this time. The only bit of color I could find was a slight red lingering on my sedum's seedheads. I quickly snapped those up.

Eventually, I decided to bite the bullet and visit a craft store where I bought some dried yellow flowers plus some seed pods with a slight lavender tinge. Pricey, but definitely worth it.

So there you have it. I hope you'll try making your own version. You don't need anything fancy. I used a Mason jar filled halfway with river rock to hold all the stems upright. A bit of raffia tied in a bow added a final touch.

Don't sweat the details. After all, this bouquet will be fleeting, one that will quickly give way to holiday greens. It is, however, a good way to share some of your garden's bounty with your family on a special day.

Here's wishing you all a very happy Thanksgiving!

By Karen Geisler

Tuesday, October 23, 2012

The Ghoulish Garden

Mums, Obsidian heuchera and orange pansies

 
Is Halloween your favorite holiday? Worn out your copy of the "Little Shop of Horrors?" Then you may need a ghoulish garden.

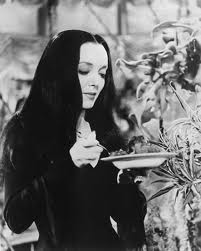
Ask yourself, what would Morticia plant? Lily Munster? Or Elvira, Mistress of the Dark? Surely not anything ordinary, something cheery like daisies. No, any of these witchy women would brew up something wonderfully wicked.

Caroline Jones as Morticia
Photo: Gregg's Shock Theater


The most obvious choice is one with bite -- a carnivorous plant like a Venus fly trap.

Who can forget Audrey II in the "Little Shop of Horrors" yelling “Feed Me"?  Or Morticia’s special relationship with her “African Strangler,” Cleopatra?

Unfortunately, these along with a number of other plants like Dracula orchid, Voodoo Lily (Amorphophallus) and Bat Flower (Tacca chantrieri) can't survive Chicago winters outside. But there are lots of other ways to spook-ify your garden.
  
Thankfully, black seems to be the “in” color lately when it comes to flowers.  There are now black pansies, tulips, coral bells, hollyhocks, iris, dahlias and petunias -- just to name a few.

Well, they’re actually more of a deep purple or deep red for the most part, but why be picky?  They are the closest plant breeders have come so far and a lot depends on the light in which they are viewed.

Using black in the landscape can be a bit tricky although it’s a treat when done right. You need some contrast so the black doesn’t just fade into the background. White or gray foliage – think full moon -- generally works well in that regard.

Try Ghost Japanese painted fern (Athyrium 'Ghost') with its silver foliage or a Ghost hosta if you have some shade. Artemisia, sometimes called wormwood, is good in full sun. For a punch of color, add something like Orange Meadowbrite ™ coneflower (Echinacea ‘Art’s Pride’) or Blackberry Lily (Belamcanda chinensis) which has great seed pods in the fall.

 
Bela Lugosi daylily
Bela Lugosi daylily

If you’d like a more varied palette, there are a number of haunted hemerocallis. Bela Lugosi daylily has a special place in my garden, for instance, because of my husband’s love of horror movies. There’s even a Lily Munster daylily. (For a more complete list, visit The Haunted Gardens blog by clicking here.)


Black and orange pansies
Orange and black pansies are a classic.

You could take a cue from Gomez Addams, Morticia's husband, who grew roses (for the thorns), hemlock and hen’s bane (for their toxicity) and poison ivy.  My advice though, is to stick with something like witchhazel (Hamamelis ssp.) for its brilliant fall colors or Ghost ™ weigela (Weigela florida  'Carlton') which has foliage that starts out green and turns a butter yellow as the season progresses. Both are pretty and won’t get you in as much trouble with the neighbors.
 
Of course, the biggest problem with a ghoulish garden is that the Midwest's weather is so unpredictable around Halloween. Your best bet may be orange and black pansies as they can take some cold temperatures.

In the photo above, I used them with Graceful Grasses® Vertigo® pearl millet (Pennisetum purpureum) (named after the famous Alfred Hitchcock thriller no doubt) and some 'Bronzilla' sedge (Carex flagelifera). Obsidian coral bells, the blackest Heuchera, is shown in the container at the very top. You also could add some pumpkins or dead branches with spider webs just before the Big Night.
 
If you need something even spookier, consider a gargoyle or mythical winged creature of some sort. Still want more? I've actually spotted several zombie garden gnomes on the Web. You can't get much more horrific than that.
 

By Karen Geisler

Monday, July 2, 2012

The Fireworks Flower


Coral Reef bee balm
Monarda didyma 'Coral Reef'

Fireworks are everywhere this time of year. They're the ultimate celebration of summer, an explosion of color in the night sky.

So I was a bit puzzled a few years back when my son said he really liked our "fireworks flowers." I had no idea what he was talking about.

Imagine my surprise when he took me to the front of our house and pointed to the Raspberry Wine bee balm (Monarda didyma 'Raspberry Wine').  There were more than enough flowers for a bouquet as well as the bees and hummingbirds, so we took some of the "fireworks" inside.

The name has stuck ever since at our house.

One of monarda's many common names actually is "firecracker flower" according to an online search. I always think of a firecracker though as being loud and obnoxious. Fireworks, now fireworks are pretty. And these flowers can be very pretty when in bloom.

Monarda more often is called bee balm or Oswego tea. The latter name is a reference to the Oswego tribe of western New York. Many Colonists apparently used monarda leaves after the Boston Tea Party as a way to protest the British tax on East Indian tea. And yes, it does attract bees so keep that in mind when choosing a location.


Bee on Raspberry Wine bee balm
A bumblebee on Monarda didyma 'Raspberry Wine'

This native plant is a great way to attract pollinators to your garden. It's hardy from zones 4 to 9 and generally grows about 2 to 4 feet, with a spread of about the same size. Two new introductions, Petite Wonder and Petite Delight, are smaller at about 18". Monarda generally flowers in July for me, although it's much earlier than usual this year due to the extremely warm weather.

Its flowers come in white, pink, red, rose and purple. The leaves, when rubbed, have a smell that can only be described as "spicy."

The biggest concern with monarda usually is mildew. I've found the plant definitely needs at least six hours of sun to help ward off the white stuff. Good air circulation helps as well.

Many of the newer varieties have been bred to be more mildew resistent. This year has been so hot and dry in the Chicago area that mildew hasn't been a problem anywhere in my garden. There have been many summers, however, when my monarda wasn't so lucky.

The best thing to do in such cases is to cut the plant back to the new foliage near the roots. You also may have to do this if the foliage starts looking ratty once the plant has finished blooming. That's why I originally put Raspberry Wine toward the back of my border. That way it will be hidden from view if I have to cut it back.


Gardenview Scarlet monarda
Monarda didyma 'Gardenview Scarlet' in the garden


Be sure to give monarda lots of room to spread. As a member of the mint family, it's usually pretty vigorous. I think it actually looks better in a drift. And don't worry if it gets too big for its original location. It usually spreads by underground runners and I've found the new plants are easy enough to remove.

As you may have guessed from my comments above, I'm usually a bit of a pyro around Independence Day. Given the current drought, I think I'm going to have to limit my fireworks this year to "fireworks flowers." Maybe not as exciting, but much, much safer.

By Karen Geisler

Have a great Fourth of July!

Closeup Coral Reef' monarda flower


Thursday, May 10, 2012

M-O-T-H-E-R in the Garden

Callibrachoa 'Cali Pink Star'
Million bells or Calibrachoa 'Cali Star Pink''

"M" is for the million bells she gave me.


Queen of the Sea hosta
Hosta 'Queen of the Sea'

"O" means she's original and likes her foliage bold.

Hosta 'Tears of Joy'
Hosta 'Tears of Joy," a miniature

"T" is for the tears when she first saw me
Dicentra spectrabilis 'Gold Heart'
Bleeding Heart or
Dicentra spectrabilis 'Gold Heart'

"H" is for her heart of purest gold.

Lucerne blue-eyed grass
Blue-eyed grass or Sisyrinchium angustifolium 'Lucerne'

"E" is for her eyes, with love light beaming.

Wisley 2008 rose
Rosa 'Wisley 2008,'  a David Austin rose

"R" is for the rose she'll always be.

Put them all together they spell

"Mother"


A word that means the world -- and the garden -- to me.

(With apologies to poet Howard Johnson)
 
By Karen Geisler

Sunday, May 6, 2012

Mother's Day Gifts for Gardeners


Mother's Day is fast approaching. Visit any garden center next Saturday and you'll be sure to see several very harried fathers with their kids in tow, shopping frantically for Mom. If you're one of these non-gardeners, you could fall back on that old standby -- a rose bush. But if you want to give something a little more special this year, here are a few suggestions.


-- A make-it-yourself garden stepping stone.

This requires a bit of advance planning/shopping but it will be worth it. I would have loved one of these when my son was growing up. Alas, now he's practically grown up and my chances of getting one of these -- well, I might as well wish to actually get the car on a Saturday night.


 -- Great garden clothing.

Who says you have to wear dowdy, grass-stained clothes when gardening? That's just so Medieval!

Boots and clogs now come in all sorts of wonderful colors and patterns. Just be sure to know Mom's shoe size before you go to the store.  And if your Mom is a hat person, well, you're in luck! There's no better way for a gardener to keep the sun off her face and neck!


-- A cool looking birdhouse. Invite the birds to join your mother in the garden. You could buy one at your favorite neighborhood garden center. There also are kits available. Just don't leave it plain. Dress it up with your own special style!


-- Garden statuary. Depending of the size of your budget, a statue, fountain or wall hanging might be something to consider. Does your Mom love frogs? There are lots of those available. Garden gnomes and decorations you can hang on a wall or gate are also awesome!


-- A colorful garden accessory. Pots, chairs, globes and other goodies for the patio come in a lot of exciting colors these days. Of course, clay pots do have their place. But if your Mom just wants to have fun, something lime green may be just the ticket.


-- Containers planted with flowers. You can buy them ready made or, if your Mom is more a do-it-yourself-er, get her a gift certificate for her favorite nursery.


-- Good hand tools.  At the risk of sounding like a broken record, I will reiterate a suggestion I made just before Christmas. Practically every gardener would like some high-quality tools, Alas, these generally aren't something we generally buy for ourselves -- not when we need more plants for the garden.

-- The usual suspects. These include a membership to the Chicago Botanic Garden, the Morton Arboretum or another public garden near you. Gardening books, especially those on a topic near and dear to your Mom's heart. Gloves, but only if they're not too big. (Save the receipt.)

-- The best gift of all. This is spending time in the garden with your mother. Help pulling weeds or picking up the same is very, very much appreciated! It's right up there with turning the compost pile, planting annuals or hauling bags of topsoil to the back yard.

Here's hoping you all have the happiest of Mother's Day!!!
 
By Karen Geisler


Related Posts Plugin for WordPress, Blogger...

Share: