Showing posts with label evergreens. Show all posts

Tuesday, September 30, 2014

Conifers are the Cure

Does our Zone 5 plant palette ever seem limiting to you? Do you yearn for just one specimen plant that no one else in northern Illinois has? Do you ever look at your garden and think, "If I could just get a plant with year 'round interest for that spot I'd be so much happier with my garden?" I know I'm always thinking what would be hot in this or that spot. Do we need a support group for those of us looking for plants off the beaten path?

If it existed I would suggest "Conifers are the Cure". For those that haven't been smitten or bitten yet, but want more landscape interest the world of evergreens awaits. The range of colors (gold, blue, lime, silver and more), forms (columnar, weeping, globe, pencil point and more), needle textures and often wonderful cones is far broader than you might think.

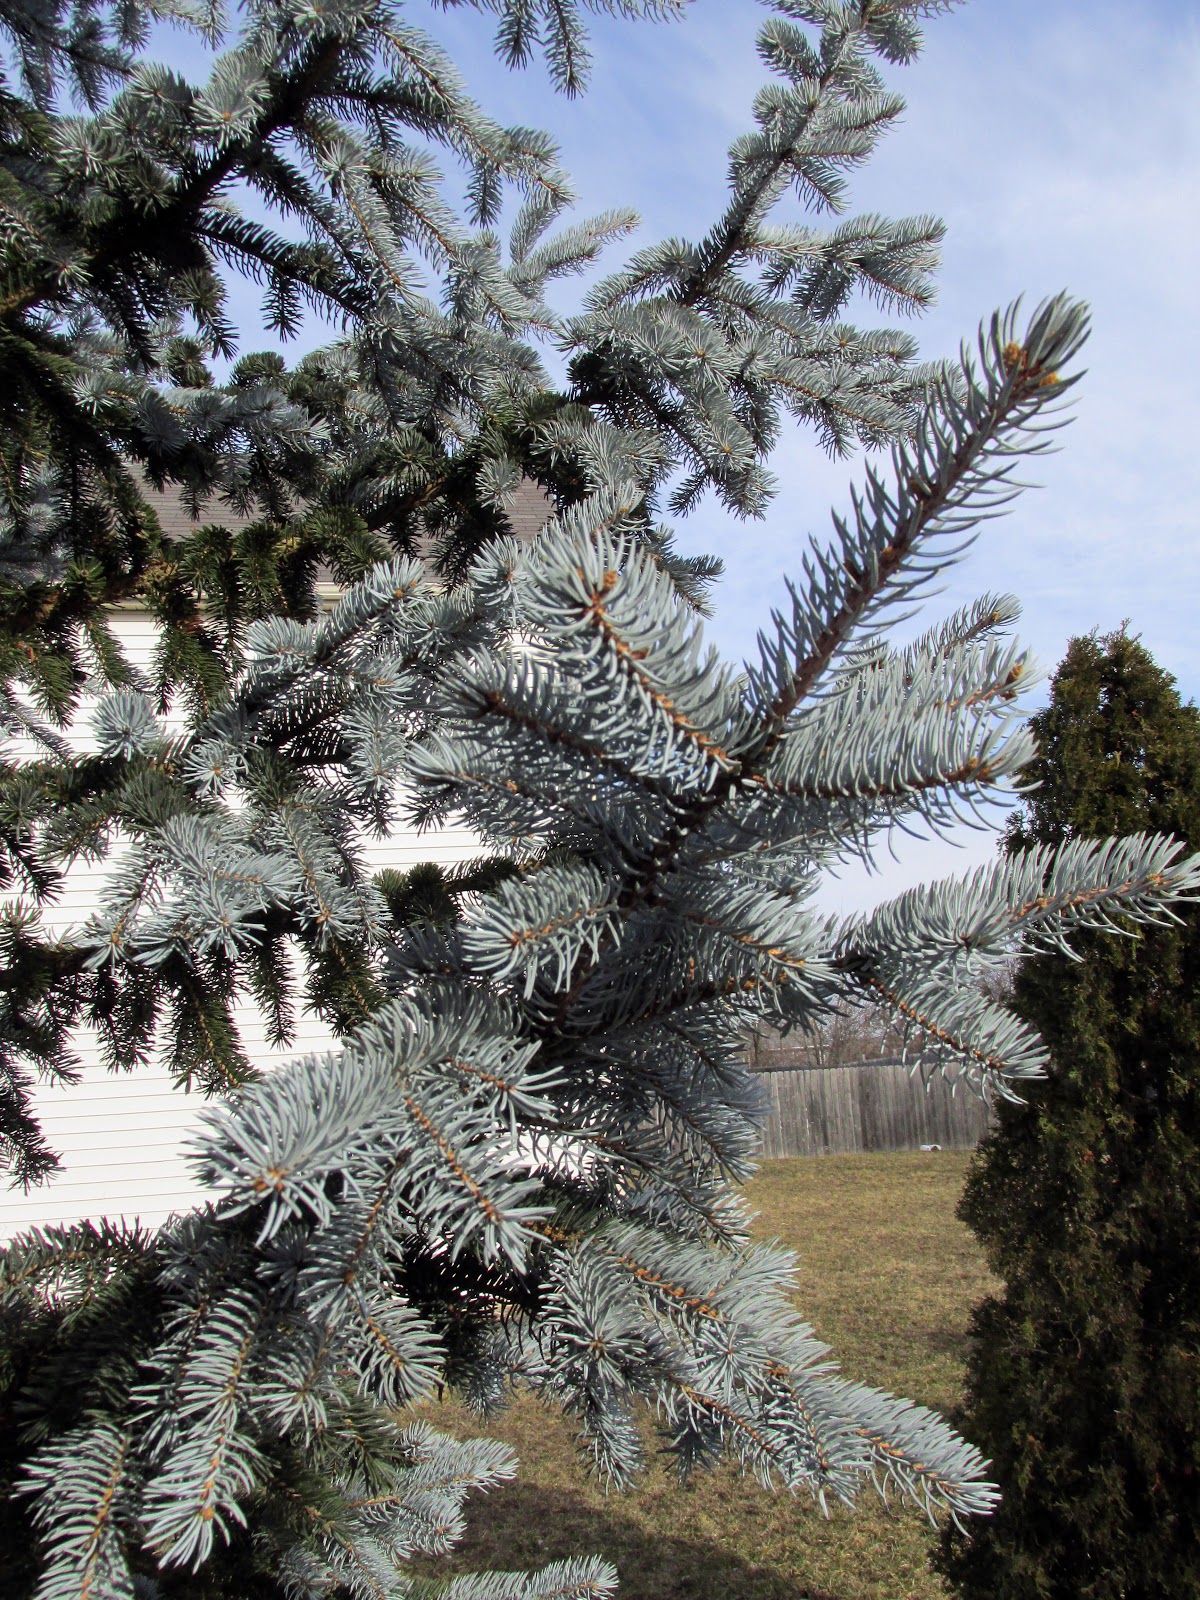
For example: Blue spruces come in different shapes. Love the powder blue color of 'Fat Albert', but lack the space for a 30' tree? Two dwarf forms are popular and readily available. 'Globe' blue spruce exhibits the same intense color typical of the best grafted blues, but with a flattish top, maturing at 5' tall and a bit wider than that.

Globe Blue Spruce
If you want something more sculptural imagine a weeping blue spruce for your garden. One great cultivar is 'The Blues'- kind of clever, eh? Weeping/sad/blue.... But it doesn't look sad. Like most weeping evergreens the mature height and spread tend to be variable based on how they're trained as young plants. A 5-6' height and wider spread might be a realistic expectation after 10 years.

Need another true blue option other than spruce? Pictured below is a Dwarf Blue Concolor Fir (Abies concolor 'Glauca Compacta') . The color is certainly equal to any blue spruce, but the needles are velvety soft to the touch. It withstands temperature extremes and drought, but only reaches 8' tall, with a space-saving 3' girth.

Dwarf Blue Concolor Fir

Norway spruces, with their dark, dark green needles come in all shapes and sizes including weeping, too. Again, like other weepers variability is to be expected. Norway's do tolerate shade, if they're forced into that situation. The dark color on such an architectural specimen arising from winter snow is pretty stunning.

Weeping Norway Spruce
Rich, true gold exists in the conifer palette, too. The use of a gold specimen makes a standout contrast and really puts an exclamation point wherever you place it. There are wonderful yews, like 'Dwarf Bright Gold' (medium height spreader) that is gold for weeks in the spring before "greening off" for the summer. I really like 'Gold Mops' Falsecypress (Chamaecyparis pisifera 'Gold Mops') for a fun broad-based gold specimen 365 a year. It came through last winter's weather horror with no damage in my garden.

Mops Falsecypress
Space calling for a  tall drink of water, as my grandfather used to say? The columnar Norway spruce (Picea abies 'Cupressina') fills that bill perfectly. Growing rapidly to at least 30' with a 6' spread, this one has multiple uses. Could be a specimen (single plant by itself in a starring role), staggered in odd-numbered groupings to define a space or single file to create a screen where height and minimal spread are desired. Again, any Norway spruce can do sun or considerable shade.

Similarly height-blessed, but width-challenged,  is the wonderful Weeping white spruce (Picea glauca 'Pendula')  pictured below. This is a great plant to break the strong horizontal lines of a ranch house. Always a predictable pencil-pointed, silver-gray specimen, pruning is never needed. This shape is just genetic destiny. Like most conifers more sun means a fuller, denser plant.

Weeping White Spruce
                 
Do take the time to explore all your options beyond arborvitae, yew and blue spruce. Honestly, finding just the right evergreen specimen can cure the 'garden blahs'.

Sunday, January 20, 2013

Everblues

Hoopsi blue spruce
Hoopsi Colorado blue spruce
Living in the Chicago area, I've always appreciated the blues -- especially those in my garden during the winter.

I have nine evergreens with blue or green and blue needles that provide much needed color this time of year. For most of the growing season, these conifers retreat into the background, providing texture and a nice backdrop for the perennials and shrubs. In the winter, though, they take center stage.

It wasn’t always this way. Evergreens and I started out like Elizabeth Bennet and Mr. Darcy in Jane Austen’s Pride and Prejudice. I thoroughly disliked the scrubby junipers in the foundation planting at my first house as well as a taller, sharp-needled juniper near the front door that seemed to attack every visitor. They were quickly removed. I vowed never to plant an evergreen.

Living through a few snowy Minnesota winters with next-to-no color in my back yard softened my position. I planted an arborvitae to screen my wood pile.

Then I moved to the Chicago area where I eventually worked part-time at a nursery specializing in dwarf conifers. It was an eye-opening experience, to say the least. I never realized that evergreens came in so many sizes, shapes and colors besides green. Many are slow-growers or very narrow, perfect for typical urban lots.
 
Blue quickly became my favorite because it complements the purple, blue and pink flowers I tend to plant. Call me old fashioned, but don’t call me late for dinner.

Here are my "everblues."


Dwarf globe Colorado blue spruce


1.)    Dwarf Colorado Blue Spruce. (Picea pungens glauca globosa) A globe that anchors the main bed in my front yard. A slow grower, it will eventually be about 3-5' tall and wide. A nice complement to blue oat grass (Helictotrichon sempervirens). 
 

Hoopsi blue spruce


2.)    Hoopsi Blue Spruce (Picea pungens ‘Hoopsii’).  Tall, thin and true blue. A slow grower, it will eventually reach 20-30' tall, and just 5' wide. It was the first evergreen I planted after moving to my current home and the tallest one.


Blue Star juniper

3.)    Blue Star juniper (Juniperus squamata ‘Blue Star’). A small ground hugger, only 2-3' tall and 3-4' wide at maturity. The needles take on a bronze tone during the winter.


Vanderwolf's Pyramid limber pine with needle closeup
 
4.)    Vanderwolf’s Pyramid Limber Pine (Pinus flexilis ‘Vanderwolf’s Pyramid’). These branches with their blue and green needles are verrrry flexible, a plus if you have small children running around in your back yard. Open habit. Another slow grower, its eventual height is estimated at 20-25' tall and 10-15' wide.
 
Blue Shag white pine

5.)    Blue Shag white pine (Pinus strobus ‘Blue Shag’). This round ball with blue and green needles is a slow grower but could eventually become 5' by 5'. Located near my front door, it blends particularly well with perennials.

Candicans white fir
 

6.)  Candicans white fir (Abies concolor 'Candicans'). Wonderfully thick blue gray needles. Will gets to be 30' tall and 10' wide. Has purple pine cones. My neighbor actually asked me if the pine cones were real!

The following are harder to find, but be sure to pick them up if you spot them.
 
Blue Serbian spruce

7.)    Blue Serbian Spruce (Picea omorika ‘Glauca’). I love the swooping nature of the branches and the blue color makes it even more special. Eventually will reach 50-60' high and 20-25' wide.

Yukon Blue white sruce
 

8.)    Yukon Blue white spruce (Picea glauca ‘Yukon Blue’). This evergreen has short needles that are almost a “smoky’ blue and cute, tiny pine cones. It supposedly will eventually reach 12' tall and 5' wide. Another slow grower, it isn't in danger of reaching that anytime soon.

 
Blue Tear Drop black spuce

9.)    Blue Tear Drop Black Spruce (Picea mariana ‘Blue Tear Drop’). Its foliage is an unusual shade of blue grey and its branches are slightly droopy. Will only get to about 3-4' in 10 years.

Of course, I do have an extensive wish list. It includes a Dream Joy juniper (Juniperus squamata ‘Dream Joy’) which has blue needles and yellow tips. Ah, conifer lust!!

I am watching my evergreens particularly close this year because of the ongoing severe drought in my area. They generally don’t show the signs of stress until the fall when they have their annual needle drop. Evergreens also can dry out quickly in the winter because the frozen soil doesn’t allow the roots to replace the moisture lost through evaporation.

I kept watering them well into November (and have the water bill to prove it). Our precipitation is still about 10” below normal and -- with little snow cover -- it looks like that won’t be changing anytime soon.

Still, I’m willing to keep it up and provide some TLC next spring. Without my blue evergreens, I’d definitely have a bad case of the winter blues.

By Karen Geisler


Dwarf globe and Hoopsi blue spruces
Globe Colorado blue spruce with Hoopsi blue spruce in the background

Sunday, December 9, 2012

Meet Me Under the Kissing Ball

Kissing Ball
 
I’ve never cared much for mistletoe at Christmas. A kissing ball, though, now that’s a different story.

Not that I need a kissing ball in my life, mind you. (Although after 25 years of marriage, it probably wouldn’t hurt either.)

No, I like the idea of a kissing ball. Festive greens hanging on a colorful ribbon. An excuse for smooches, hugs and a little PDA (Public Display of Affection) around the holidays. What’s not to like?

Somehow I’ve just never gotten around to buying or making a kissing ball. I've vowed to shake things up a bit this Christmas, though, so it went straight to the top of my to-do list.

Mistletoe goes way back to the ancient Greeks and the Druids. Both used mistletoe -- thought to symbolize fertility and power -- during their celebrations of the winter solstice, the shortest day of the year.

The tradition evolved. Evergreens were added. During the Middle Ages, anyone standing under the mistletoe could not object to being kissed. And anyone who wasn't kissed under the mistletoe supposedly wasn't going to be married in the next year. Or so the story went.

The Victorians updated the tradition a bit more, adding herbs. The kissing ball reached the height of its popularity although it has made a comeback in recent years.

So how to get a kissing ball? I thought initially about trimming the boxwoods in my back yard.  But they’re only a few years old and I loathe cutting back anything that’s still green in my garden this time of year. So it was off to my favorite nursery/garden shop.
 

Red berries for a kissing ball
Red berries, red ribbon and cedar
 
I gathered up some oregonia, which is like boxwood but with white and green leaves, and a packet of (fake) red berries. Then I visited a craft store for some ribbon and a base. There wasn't any floral foam to be found, at least in a ball shape. Floral foam gets soaked in water and would have kept the greens from drying out. I checked other stores, but came away empty handed so I reluctantly went with Styrofoam.
 

Kissing ball base with straw and skewer
The process of making a kissing ball turned out to be much more involved than I had anticipated. I put a metal barbecue skewer through the middle of the ball, then used the skewer to guide a drinking straw. That, unfortunately, was the easiest part.
 
Next, I  cut some transparent ribbon, enough to make a loop at the top and have some dangling below the ball. I pushed the ribbon through the straw using the same metal skewer. Then, I put a knot on the bottom where the ribbon came out in order to secure the ball.

I started cutting oregonia and putting it all around the foam ball. Using a toothpick to make a hole before inserting the evergreen sprig made things go much faster. The more oregonia I put on the ball, however, the more the bottom knot in the ribbon seemed to slip. I ended up putting a toothpick in the bottom knot to make it hold better.

A toothpick at the bottom helped
keep the knot tight
After I had covered the entire ball with a spotty layer of oregonia, I added some cedar leftover from my winter container and some trimmings from the Frasier fir we had bought as a Christmas tree.
 
Then I went back and filled in the bare spots. And filled in the bare spots. And filled in even more bare spots.
 
The final touch: Adding berries all over and some thin gold and light green ribbon at the bottom.

Total time elapsed: 5 hours

Well, I had been halfway watching some of the Sunday morning political talk shows when I started but the total amount of time did take me aback. Maybe it was because I hadn't made a kissing ball before. 
 
I'm happy with the result although the jury is still out on whether or not it boosts the amount of kissing in our household this Christmas. Even Nate Silver probably couldn't call this one.

By Karen Geisler

Monday, December 3, 2012

Ten Steps to Great Winter Containers


Winter container garden with fresh evergreen (Photo credit: Karen Geisler)
 
With the start of December, it's time to go full speed ahead on everything Christmas -- even if the temperatures in Chicago are near 60 degrees. For me, that means decorating the front door with a container full of fresh evergreen branches.

I still customize and hang a wreath as I've done for more Christmases than I'd care to admit. A winter container garden, though, is a recent addition and has proven to be a nice complement.  It was a bit intimidating at first, but with a few helpful hints from my co-workers, the pots have started looking better and better.

Tip #1 -- Use many different types of evergreens. Spruce and pine are all well and good, but other evergreens can add different colors, textures and fragrance. The more the merrier!

Tip #2 -- Use topsoil, not potting soil, in your winter container. Topsoil is heavier and therefore much better at holding evergreen stems upright.

Tip #3 -- Make it your own. Add berries and other natural materials. Throw some glitter in the mix. Or omit red to make it more of a generic winter pot. It's all up to you.

Below is the official Chalet Nursery winter container "recipe" formulated by horticulturalist Jennifer Brennan. Its 10 easy steps will help you add a classy touch to your home's entrance in no time flat.

Ingredients:            Spruce tops, small or medium
      White pine tips
      Noble fir tips
      Port Orford cedar
Blueberry juniper
Incense cedar
Winterberry and red twig dogwood 

Tools needed:         Top soil, placed in container and watered
                                    Polyurethane container
                                    Pruning shears
                                    Wire cutters
                                    Wilt-Pruf
 
Step by step directions:
 
  1. Select a spruce top that is twice the height of your container and insert into the middle of the container.
  2. Insert 3 more spruce tops that are shorter than the first, placing one in each third of the surrounding area. This is your “foundation,” the basic form of your arrangement.
  3. Select 5 white pine cuttings to insert through out the spruce top foliage for texture and color variation.
  4. Add 3-5 Noble fir tips.
  5. Accent with 3-5 Port Orford cedar tips for an arching soft shape and for the lemon scent it provides.
  6. Place 3-5 incense cedar tips throughout the arrangement to accent with the yellow color; one in the middle of the arrangement, 1-2 cascading over the edge of the pot, and 1 echoing the central spruce top.
  7. Do the same with blueberry juniper if desired.
  8. Use 5 redtwig dogwood stems as color extensions, placed throughout the arrangement.
  9. Place 3 winterberry stems for the final accent. Use as you would use lipstick – the focal point, to draw the eye into the most interesting part of the arrangement. You can also add pine cones, lotus pods, eucalyptus and other materials.
  10. Spray the entire arrangement with Wilt-Pruf (to prevent drying) and place outside to enjoy until March.
Yes, that's right -- March. A few branches may turn brown, but most of the arrangement should last until you can almost smell spring in the air. For the best results, try planting some miniature evergreen trees in your pots and generously water them in.

In the picture above, I kept the arrangement low because my container, the base on an old fountain, was shallow and already pretty high. It includes white pine, Noble fir, Port Orford cedar, incense cedar, red twig dogwood, huckleberry stems, seeded eucalyptus, lotus pods and some red balls.

A note about containers: Use one made of metal, resin, plastic or concrete. If you use ceramic or terra cotta, it could crack if the soil has water in it and freezes.

Picture below are some pictures of winter container gardens done by Chalet. How do you decorate your front door for the holidays?

Winter pot with winterberries by Chalet Specialty Garden Care staff

Winter pot with blue eucalyptus and white sticks by Chalet's Specialty Garden Care staff

Winter container garden with oregonia and orange berries by Chalet's Specialty Garden Care staff
 
 
Winter container gardens with dogwood and winterberry by Chalet's Specialty Garden Care staff


By Karen Geisler

Friday, December 9, 2011

Holiday Greens


This was done by a professional but you can (and should) try this at home.

Nothing says Christmas to me like fresh evergreens. Having them in a pot near the front door or putting a fresh wreath on the front door provides great color, great texture and a heavenly scent.

I’m no Martha Stewart, but I love decorating a front door wreath differently each year. I’ll add a plaid ribbon bow one year and a shiny red one the next. My holiday pots also vary from year to year. It’s a good creative outlet once the garden has gone to sleep for the winter. 


Incense cedar
Variegated arborvitae

Some people, of course, prefer artificial trees, wreaths and other greens. I realize this works better for some people inside the house, especially those with allergies. But putting artificial greenery outside, not too far from real evergreens in my entryway garden, somehow just doesn’t seem right to me. To each their own, though.

I started out just using the trimmings from the bottom of our Christmas tree. In recent years, I’ve graduated to a mixture of greens including cedar, incense cedar, variegated arborvitae, blueberry juniper, white pine, Noble fir and/or Douglas fir. (One of my friends insists the latter smells like whiskey!) Each type has its own unique texture.


Winterberries

There’s also a whole host of materials that can add color and texture. These include pine cones, lotus pods, holly, variegated holly, huckleberry (with lovely red tones), eucalyptus, seeded eucalyptus, pepperberries, canella berries, holly berries and even the white tallowberry..

Variegated holly
To add height, you can use curly willow, pussywillows and the wonderfully contorted fantail willow. Plus there's always an old standby -- red dogwood twigs.

Be sure to use plastic pots, either on their own or as a liner. Clay pots can break if the soil in them freezes.

There are a few tricks to using fresh evergreens. Mash the ends of the woody stems as this allows the branches to draw in more water. Then soak the branches overnight in a bucket or other container filled with water. Arrange. Spray with an antidesiccant if the pot will be in an exposed or sunny area.

The final result should carry you into January and possibly beyond. The pots on my covered porch typically last into February, depending on the weather.


I hope you’ll trying using some fresh evergreens on or near your front door this year. It will make your entry uniquely yours.

Happy Holidays!


By Karen Geisler
Related Posts Plugin for WordPress, Blogger...

Share: